ondering how to develop an Android app? Cut through the complexity with this practical guide. From using Android Studio to crafting a sleek interface, and from writing your first lines of code in Kotlin or Java to getting your app user-ready, we’ll detail the steps for a seamless development process. You’ll find actionable advice here to help turn your app concept into a polished product ready for the Google Play Store.
Key Takeaways
Android Studio is the primary IDE for Android app development, offering tools like a code editor, debugging, testing, performance tools, app templates, and it simplifies the creation of multiple APKs with its Gradle-based system.
Developers have the option to choose between Java and Kotlin for coding, with Kotlin offering advantages like less complex syntax and null safety features. The Android SDK is also essential, providing tools and guidelines like material design for UI development.
The process of Android app development encompasses UI design using components and layouts, adding functionality, testing and debugging within Android Studio, and can be enhanced with advanced features such as push notifications, location services, and cloud integration before publishing on Google Play.
Getting Started with Android App Development
The process of developing an app for the Android platform offers substantial rewards and prospects, presenting immense advantages such as captivating users, ensuring consistent performance across various devices, enjoying extensive community backing, and the possibility to weave in advanced technologies like AI, IoT, and AR/VR. For developers who venture into Android’s realm, it’s a chance to turn creative visions into tangible applications where possibilities soar boundlessly.
Android is celebrated for its open accessibility and minimal barriers to entry, which creates an attractive environment for both novice and veteran app creators. With expedited development cycles that can span mere hours rather than lengthy periods, crafting apps on this platform accelerates market arrival times significantly—allowing developers swift access to their target user base around the globe.
Android Studio: The Essential IDE
Android Studio serves as the go-to integrated development environment (IDE) for crafting Android apps, acting as a steadfast ally in this endeavor. It offers an array of tools specifically geared toward developers, including:
A sophisticated code editor
Templates to jumpstart app creation
Tools dedicated to development, debugging, testing, and improving performance
Configured emulators that simulate various devices
This IDE supports a modular approach within its project structure and leverages Gradle for flexible build configurations, simplifying the process of generating multiple APKs suited to different device types. Within your Android Studio project space inside the IDE itself, you can perform inline debugging and use performance profilers which help you monitor resource utilization, pinpoint memory leaks, and fine-tune overall app efficiency while managing your application files with proficiency.
Designed to be platform agnostic, Android Studio operates smoothly on Windows MacOS. Unix systems featuring pre-integrated OpenJDK making it ready for immediate android app development out-of-the-box The interface presents an intuitive experience regardless of operating system ensuring uniformity across varying platforms.
Java or Kotlin: Choosing Your Programming Language
In the realm of Android app development, Java and Kotlin emerge as prime options for programming languages. For a long time, Java has been the go-to language favored by developers for crafting Android apps due to its longstanding presence in the field. On another front, Kotlin is gaining momentum within the android development sphere with its contemporary approach that offers more streamlined syntax and efficient coding practices compared to Java.
Kotlin distinguishes itself with features like null-safety which play a significant role in minimizing common issues such as null reference exceptions. This positions it as an increasingly popular choice among programmers. Nevertheless, whether one’s preference lies with Java or leans towards Kotlin, both veterans and new entrants into android app creation have the liberty to pick whichever language aligns best with their competencies and project requirements.
Understanding the Android SDK
The Android SDK serves as an essential suite of tools for developers engaged in android app development, akin to a multifunctional Swiss Army knife. It provides an extensive assortment of tools for both development and debugging that streamline the process of creating apps. By offering various SDKs designed specifically for different versions of Android, it empowers developers to cater their applications to a broad spectrum of android devices.
One notable aspect is the material design included within the Android SDK. This offers a cohesive set of aesthetic guidelines that assist in forging user interfaces which are not only visually consistent but also inherently intuitive—thereby significantly improving the user experience within your app.
Designing a User Interface for Your Android App
When engaging with android app development company, it’s crucial to focus on the user interface design. This is because a well-designed and accessible UI plays an essential role in elevating the overall experience for users, thereby aiding in making your Android app more successful. It acts as a pivotal connector between your application and its users. Hence, creating this linkage strong and appealing falls under your responsibility.
To boost an Android app’s aesthetic appeal could involve straightforward enhancements like refining buttons or TextView aesthetics or improving usability through careful adjustment of padding and margins that affect spacing within UI elements. The subsequent sections are set to delve into two fundamental facets of UI design: exploring both components & layout techniques as well as adhering to Material Design standards established by Google for coherent integration across platforms worldwide.
UI Components and Layouts
The Android framework provides an extensive toolkit for user interface design that includes:
Individual view classes such as Button or TextView.
ViewGroup categories, like LinearLayout and ConstraintLayout.
UI elements including the Next button and the floating action button.
The critical role played by view IDs in designing interfaces.
This range of tools allows for a broad spectrum of design options.
Within Android Studio lies the Layout Editor, which acts as your workspace to visually compose your application’s UI. Essential aspects of the Layout Editor include:
The use of constraint properties to define positions for views like TextViews within a layout.
A root view that encompasses all other subviews within it
Constraints between views enabling adaptable layouts compatible with diverse screen dimensions
-Incorporating Material Design guidelines on margins and padding helps significantly enhance the aesthetic appeal of an app’s interface.
Material Design Guidelines
Material Design infuses a sense of realism into the user interface of your android app, employing tangible surfaces, striking graphic design, and significant motion to forge a feeling of depth and authenticity. The aim is to deliver consistency across various platforms and devices through responsive designs and adaptable components.
Google offers distinct UI elements along with resources like the ‘Material Components for Android’ library specifically crafted for developers looking to integrate Material Design in their apps. Adherence to these standards allows you to develop an aesthetically unified and instinctive UI that elevates the user experience within your application.
Developing Your First Android App: A Step-by-Step Tutorial
Having grasped the fundamental concepts, you’re now ready to apply what you’ve learned and embark on creating your first Android app. This segment is dedicated to guiding you meticulously through each phase of development—beginning with establishing a new project, incorporating user interface components, adding features, and advancing all the way through testing and troubleshooting your application.
Upon completing these steps diligently, you will have accomplished the milestone of crafting an android app—a product of your own creation that stands as a testament to your newly acquired skills.
Creating a New Project
Starting a new project in Android Studio is essential when you want to develop and bring your app idea to life. When creating a new Android studio project, the platform provides choices of device types, complete with corresponding sample code and resources.
As part of setting up your android studio project, it’s necessary to define its name, designate the package name for your application, and choose where on your computer the project files will be stored. It’s also important to select an API level that suits the range of devices you wish for your app to support along with deciding whether Kotlin or Java will be used as the programming language. Both decisions influence how well-suited your app will be across various devices and what functionalities can ultimately be implemented.
Adding UI Elements and Functionality
After the initial setup of your project, the next step is to animate it with user interface elements and features. The structure of a user interface for an Android application consists of a hierarchy comprised of View and ViewGroup objects. Here, ViewGroup acts as containers that establish the structural layout design. To maintain functionality on different screen sizes across devices, it’s essential to specify view dimensions using relative units such as density-independent pixels.
To allow interaction within views, you can attach click listeners which define behaviors when items like buttons are activated by a user’s touch. By employing Java to incorporate fundamental functionalities—illustrated in our codelab tutorial—you’re able to create an app experience that both engages and accommodates users seamlessly.
Testing and Debugging the App
The process of app creation for Android involves crucial steps like testing and debugging. To optimize performance by analyzing memory utilization, Android Studio offers potent tools including the heap dump and memory profiler. To maintain code integrity throughout compilation, Lint checks along with integrated development environment inspections are automatically conducted within Android Studio.
Android Studio’s AVD manager equips you with the capability to:
Simulate a wide array of configurations for virtual android devices during your testing phase
Verify that your app meets both quality standards and complies with Google Play policies
Smoothly transition toward publishing your application on the Google Play Store.
Enhancing Your Android App with Advanced Features
Don’t rest on your laurels after creating your inaugural Android app. Elevate the user experience by incorporating sophisticated functionalities such as push notifications, which keep users engaged and informed. Utilize a wealth of tools including location services and cloud integration to expand the capabilities of your Android application, ensuring it stands out in a crowded marketplace.
Implementing Push Notifications
Push notifications serve as an efficient mechanism to provide real-time updates and maintain user engagement with your app. They can be seamlessly integrated using Firebase Cloud Messaging (FCM), ensuring that messages are delivered automatically to users.
In order to set up push notifications, follow these steps:
In the manifest of your application, create a service by extending the FirebaseMessagingService.
Create a notification channel for message delivery. You have the flexibility of selecting FCM’s default channel or creating a custom one.
Upon first launch of your app instance, FCM will create a unique registration token which can be tracked by overriding the onNewToken method in FirebaseMessagingService extension.
Employing Google Analytics enhances messaging strategies and provides insightful delivery metrics for optimization purposes.
Leveraging Location Services
Incorporating location services into your app can markedly improve the experience for its users. Features like automatic tracking can be implemented, which not only assist in determining whether a user is on an incorrect side of a street, but also in recognizing their activities.
To ensure that location tracking does not drain the device’s battery life excessively, adherence to guidelines regarding background location limits is crucial. By incorporating maps within your app, you offer users the ability to visualize points of interest and have control over how these maps are displayed. With geofencing technology, it’s possible to create virtual boundaries around areas in the physical world allowing monitoring within those specified regions.
Integrating with Cloud Services
Utilizing cloud services can greatly enhance the functionality of your Android app, providing users with a smooth and consistent experience. These services enable apps on mobile devices to scale effectively, maintaining performance despite fluctuating demands from users.
With cloud platforms offering AI and machine learning capabilities, developers have the tools to increase their app’s intelligence and provide more personalized experiences for mobile device users. Real-time data synchronization ensures that user information remains current across all devices used. Incorporating edge computing can lead to faster data processing, which contributes to a better overall user experience.
Leveraging cloud services not only cuts down on infrastructure costs, but also offers strong security measures to protect both the app and its users’ data.
Publishing Your Android App on Google Play Store
Completing your journey in app creation involves the pivotal phase of releasing your Android app to users through the Google Play Store. This platform is recognized for its straightforward submission procedure and adaptable guidelines.
By choosing to publish on the Google Play, you expose your app to a vast audience and enjoy the advantage of an expedited approval timeline.
Preparing Your App for Release
Before uploading your application to the Google Play Store, it is essential that you ensure it’s ready for public distribution. This preparation involves:
Crafting an APK fit for release, which must be duly signed with a legitimate release key.
Confirming that your app functions seamlessly across various Android devices and platform iterations.
Fine-tuning performance wherever necessary.
Establishing a pricing model for your app.
Evaluating whether to incorporate in-app purchases as part of its functionality.
If you aim to make your application available globally, consider taking these measures:
Adapt your app’s textual content, Play Store presentation, and any marketing materials so they resonate with the languages and cultural peculiarities specific to each target market.
Ascertain the appropriate content rating for your software and manage country-specific availability consistent with strategic business aims.
3.Thrash out all critical product particulars in readiness for creating an appealing listing on the Google Play Store.
By executing this comprehensive set of guidelines meticulously when launching internationally through Google Play. Developers can successfully connect with users from numerous countries effectively engaging them through their Android devices.
Submitting Your App to the Google Play Store
Upon finalizing your app for launch, the subsequent move is to upload it onto the Google Play Store. This requires you to produce and submit engaging promotional imagery, screenshots, and videos which effectively highlight your application on its store listing.
Summary
Kudos on your successful voyage into the of Android app development, mastering the creation process, elevating it with sophisticated functionalities, and releasing it onto Google Play. You’ve joined ranks with a worldwide network of developers dedicated to molding tomorrow through each individual app. Bear in mind that developing an app is an ongoing adventure filled with perpetual growth and refinement. Persist in your quest for knowledge, maintain your pursuit of learning, and above all else – continue to innovate!
Frequently Asked Questions
How do I start developing Android apps?
Commence your journey in Android app development by gaining proficiency in a programming language like Kotlin or JavaScript, and then proceed to install and configure Android Studio on your computer.
Next, initiate a new project within the platform and embark on writing code while paying attention to the layouts as you advance through your project.
Is it difficult to develop an Android app?
Certainly, crafting an app for Android platforms may pose difficulties for newcomers given the need for sophisticated programming abilities and the somewhat inflexible attributes of mobile coding languages. Despite these challenges, acquiring the essential skills and proficiency in relevant languages is a demanding yet achievable endeavor.
How much does it cost to build an Android app?
Building an Android app can incur widely different expenses, as basic apps may cost anywhere between $30,000 and $250,000. In contrast, the price for developing more sophisticated Android apps can start at $50,000 and go up to or exceed half a million dollars depending on the project’s details and complexity.
Can I create my own Android app?
Indeed, it is possible to construct an Android app using tools such as AppYourself even without expertise in programming. You have the ability to easily craft an android application equipped with appropriate features and modules tailored for a range of industries.
Which programming language should I choose for Android app development, Java or Kotlin?
When developing an Android app, you have the option to utilize Java, known for its extensive user community and conventional methods, or Kotlin, which provides contemporary capabilities alongside a more streamlined syntax. The decision should hinge on your personal inclinations as well as the unique necessities dictated by your application.
Website development broadly refers to the tasks and processes involved in creating and maintaining a website. This includes everything from markup and coding to scripting, network configuration, and CMS development.
If you want to get started with web development, a big part of that will be learning various programming languages. Depending on your focus, these could be front-end languages like HTML, CSS, and JavaScript or back-end languages like Python, PHP, Java, Ruby, and so on.
However, I don’t think learning programming languages is the only part of website development. You’ll also need to learn how the web works at a basic level, especially if you want to go into back-end website development.
I’ll talk about some of these areas when I take you through roadmaps for both front-end and back-end development.
Why is web development important?
Can you believe that we’re part of a world where over 5.52 billion people are connected through the internet? That’s more than half of our global population actively engaging in research, connection, education, and entertainment through this incredible digital universe.
Given the rapidly increasing number of internet users, it’s no surprise that web development is a rapidly expanding industry.
Between now and 2033, the employment of web developers is expected to grow by 8%, which is faster than most other technology careers. It‘s an exciting time to be in this field, and I’m thrilled to be part of this dynamic industry.
However, not every business needs a dedicated web developer. Many companies use content management systems and templates to design their sites. That’s especially true of small and medium-sized businesses with limited budgets. Content Hub can help these teams build an optimized website fast. WordPress and Wix are other popular options.
Web Development vs. Web Programming
Web development and web programming sound very similar — and they are. But, there’s one very important distinction.
Web development refers to the overall process of creating websites or web applications, including the project’s design, layout, coding, content creation, and functionality. It involves using a combination of programming languages, tools, and frameworks to bring a website or web application to life. Web development may also encompass project management activities, such as fielding development requests from stakeholders or freelance clients.
Web programming, on the other hand, specifically refers to the coding and scripting of a website, whether the front-end or back-end. It primarily involves writing code to handle data, process user inputs, and generate dynamic content. A web programmer will rarely, if ever, handle a large web development project from end to end. They may build a certain section of a site or troubleshoot bugs.
Understanding this difference has been crucial in my career, allowing me to appreciate the depth and breadth of skills required in the world of web creation. It’s a reminder of the diverse talents and expertise that come together to make the digital world what it is today.
Web Development Basics
What is a website?
What is an IP address?
What does HTTP mean?
What is coding?
What does front-end mean?
What does back-end mean?
What is a CMS?
What is cybersecurity?
1. What is a website?
Websites are files stored on servers, which are computers that host (fancy term for “store files for”) websites. These servers are connected to a giant network called the internet.
Now, how do we access these websites? This is where browsers come into play. Browsers are computer programs that load websites via your Internet connection, such as Google Chrome or Safari, while the computers used to access these websites are known as “clients.”
2. What is an IP address?
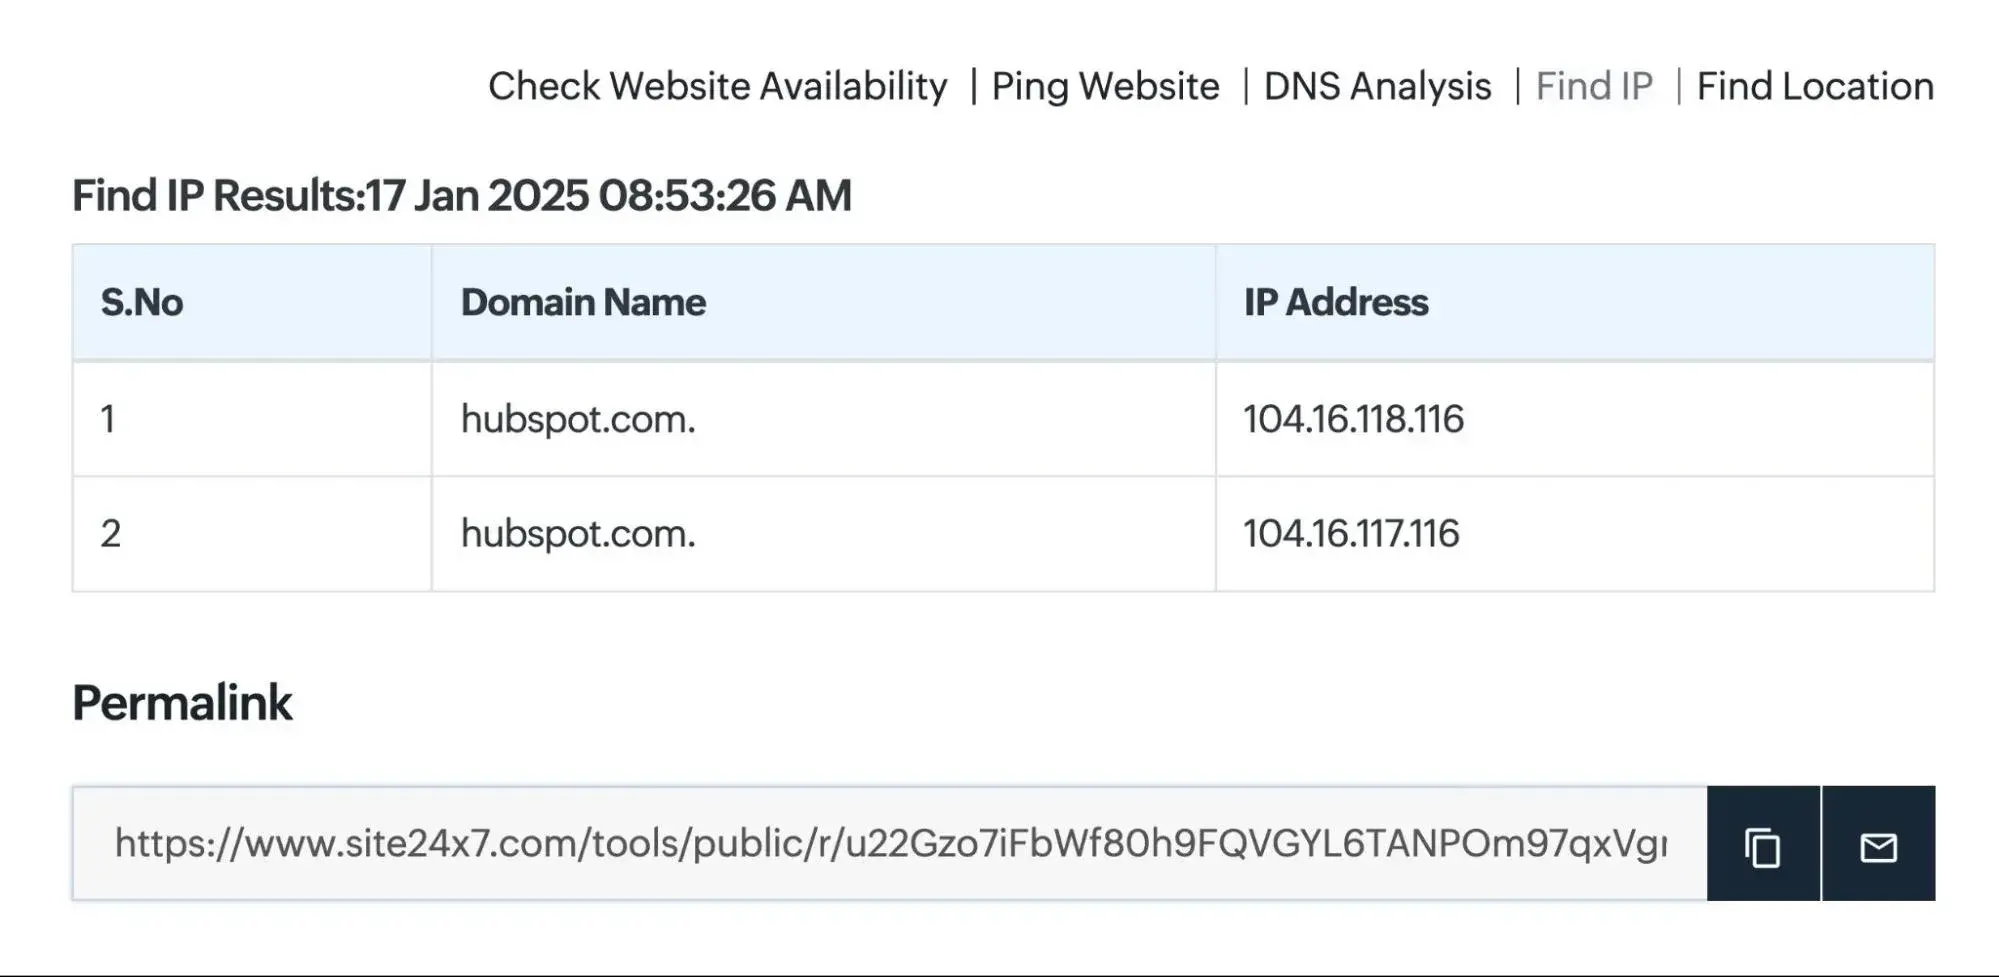
I was always fascinated by how the Internet knows where to send data. The answer lies in understanding IP addresses. To access a website, you need to know its Internet Protocol (IP) address. An IP address is a unique string of numbers. Each device has an IP address to distinguish itself from the billions of websites and devices connected via the Internet.
The IP address for HubSpot is currently 104.16.118.116. You can find any website’s IP address by visiting a site like Site 24×7 or by using Command Prompt on Windows or Network Utility > Traceroute on MacBooks.
If this sounds new to you, that‘s because you’ve been using domain names to reach websites. While you can access a website using its IP address, most internet users prefer to use domain names or by going through search engines.
Domain names are connected to website server IPs using something called the Domain Name System (DNS). If you want to be a web developer, I think it’s essential to understand how DNS works.
Pro tip: To find your device’s IP address, you can also type “what’s my IP address” into your search browser.
3. What does HTTP mean?
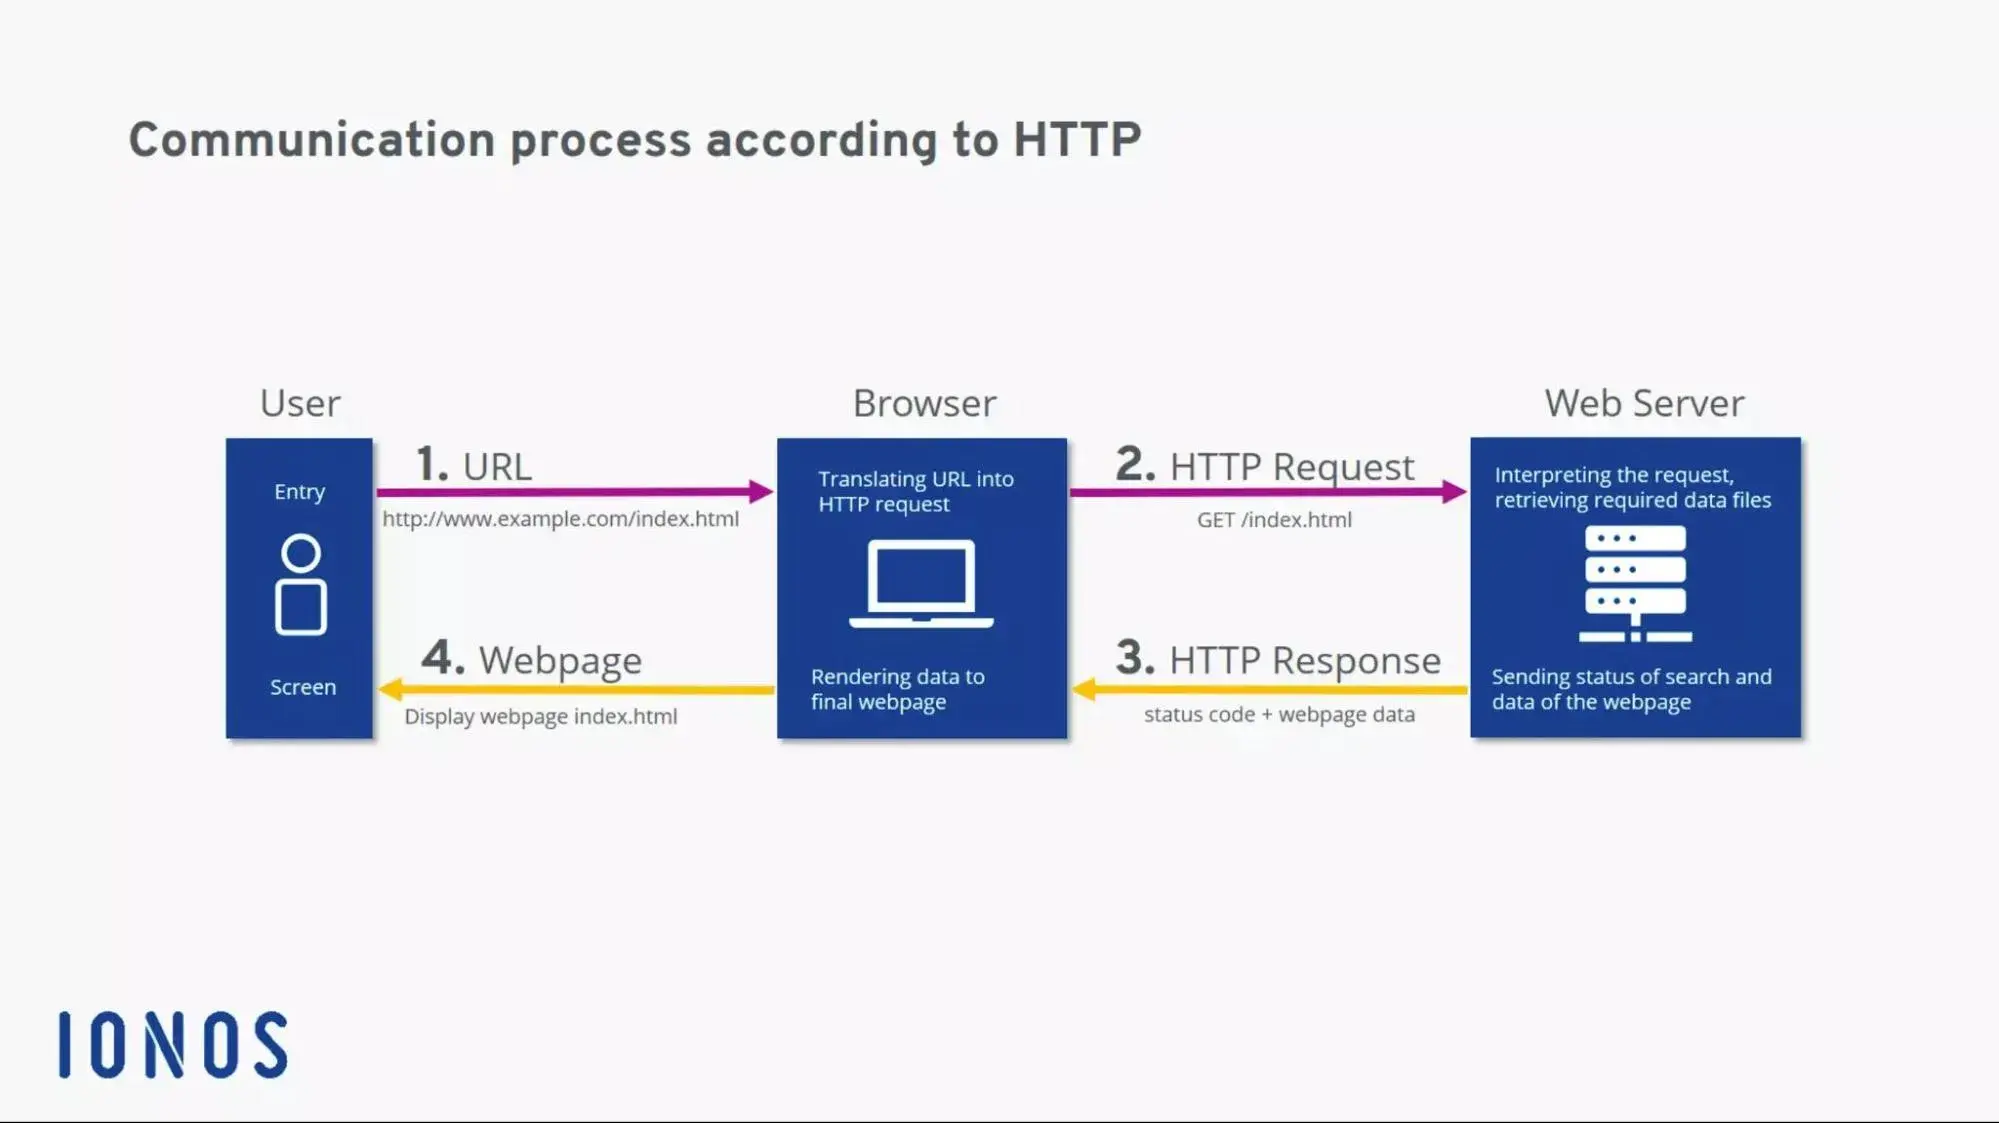
HyperText Transfer Protocol (HTTP) is what connects our website request to the remote server that houses all website data. It’s a set of rules (a protocol) that defines how messages should be sent over the internet. It allows us to jump between site pages and websites.
If I type a website into my web browser or search for something through a search engine, HTTP provides a framework so that the client (computer) and server can speak the same language when they make requests and responses to each other over the internet.
It’s essentially the translator between you and the internet. HTTP reads our website request, reads the code sent back from the server, and translates it for us as a website.
Understanding HTTP is important for all aspects of web development, but I think it’s especially essential if you want to get into back-end development.
4. What is coding?
Coding refers to writing code for servers and applications using programming languages. They’re called “languages” because they include vocabulary and grammatical rules for communicating with computers. They also include special commands, abbreviations, and punctuation that can only be read by devices and programs.
All software is written in at least one coding language, but languages vary based on platform, operating system, and style. All languages fall into one of two categories: front-end and back-end.
Pro tip: Sometimes, you’ll see that businesses are seeking a full stack developer. This means that you have expertise in both the front and back end.
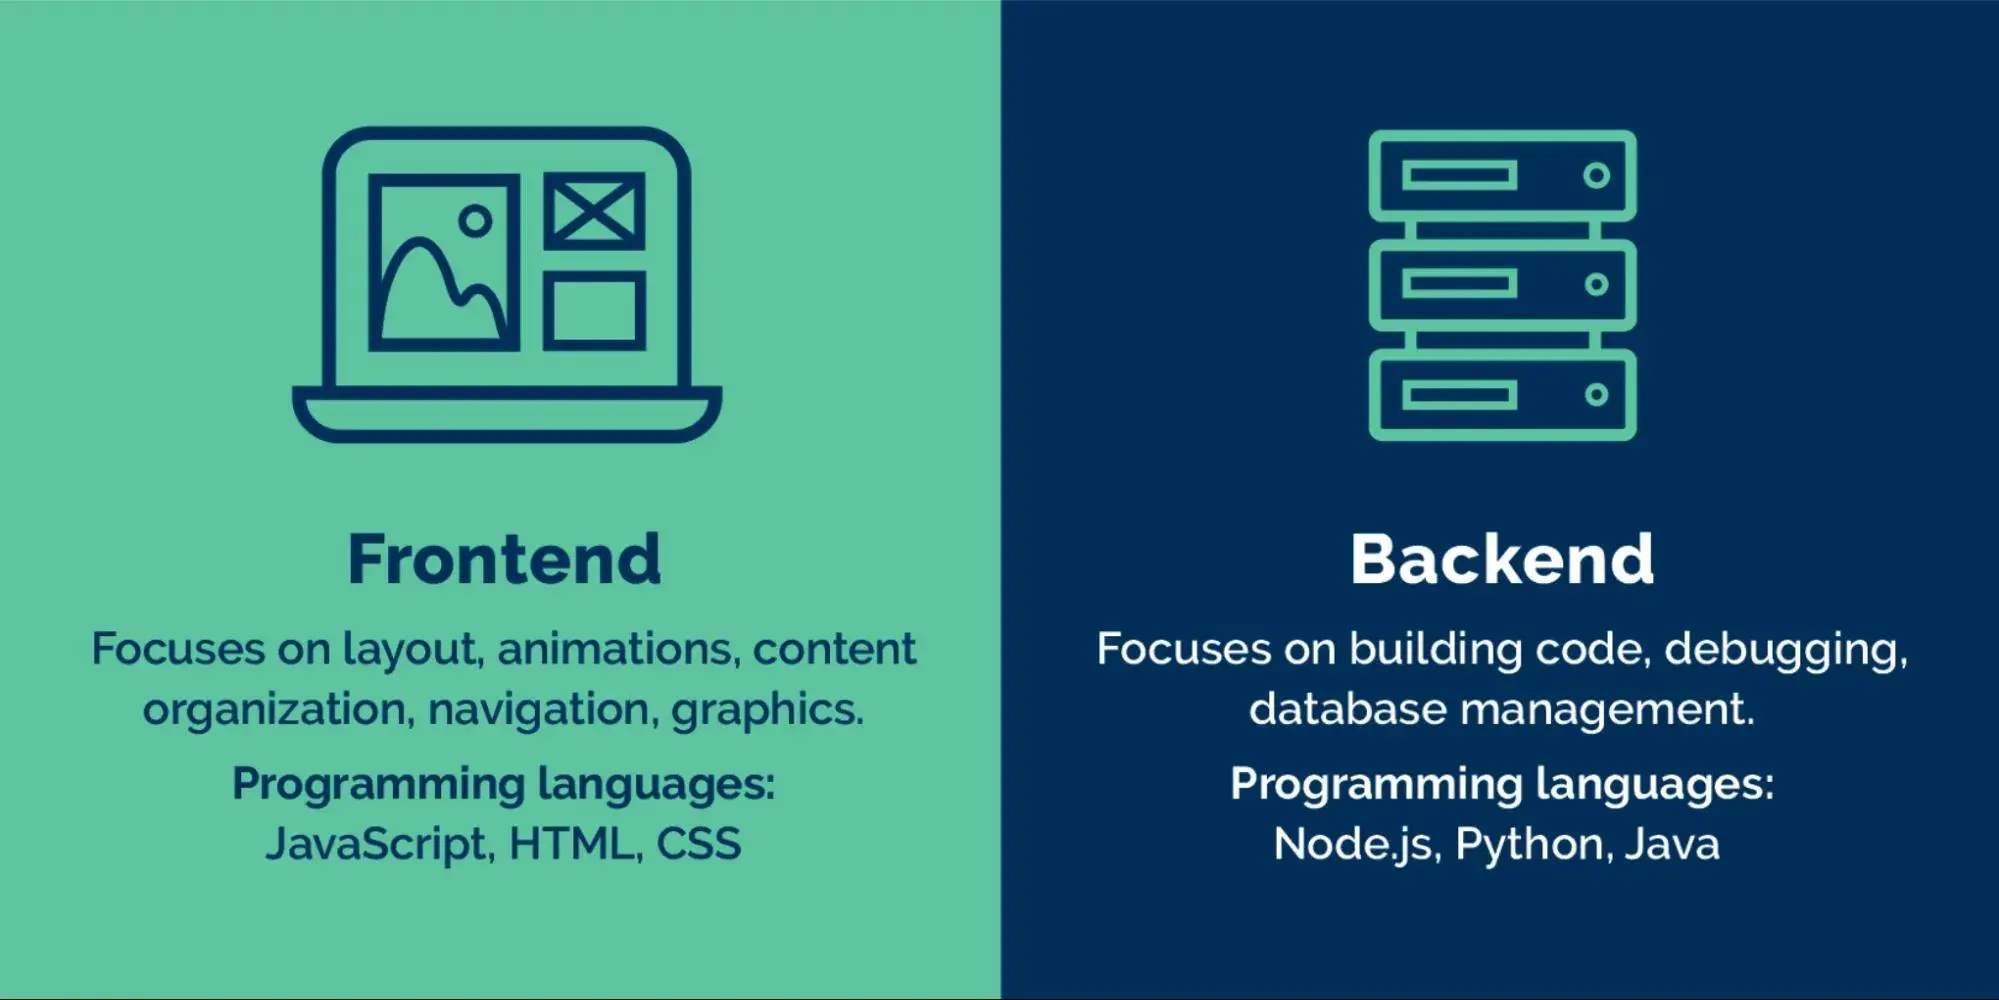
5. What does front-end mean?
Front-end (or client-side) is the side of a website or software that you see and interact with as an Internet user. When website information is transferred from a server to a browser, front-end coding languages allow the website to function without having to continually “communicate” with the internet.
Front-end code allows users to interact with a website and play videos, expand or minimize images, highlight text, and more. Web developers who work on front-end coding work on client-side development.
6. What does back-end mean?
On the contrary, the back-end (or server-side) is the side that you don’t see when you use the internet. It’s digital infrastructure. To non-developers, it looks like a bunch of numbers, letters, and symbols.
There are more back-end coding languages than front-end languages. That’s because browsers — at the front end — only understand HTML, CSS, and JavaScript. Meanwhile, a server — at the back end — can be configured to understand pretty much any language.
7. What is a CMS?
A content management system (CMS) is a web application or a series of programs used to create and manage web content. (Note: A CMS isn’t necessarily the same thing as a site builder, such as Squarespace or Wix.)
While not required to build a website, using a CMS makes things easier. It provides the building blocks (like plugins and add-ons) and lets you create the structure with your code.
Pro tip: Your CMS is often used for ecommerce and blogging, but it’s useful for all types of websites. I think it can be especially helpful if you need to display and organize large amounts of data.
There are always malicious actors looking to find vulnerabilities in websites to expose private information, steal data, and crash servers. Cybersecurity is the practice of securing data, networks, and computers from these threats.
The methods used by hackers are constantly evolving, as are the security measures taken to defend against them. Failing to understand how your site could be targeted could result in disaster.
As a result, a basic understanding of cybersecurity best practices is critical for effective web development. You should also carry out security audits on a consistent basis. This will ensure that your website doesn’t fall victim to bad actors attempting to steal your information.
Types of Web Development
Front-End Development
Back-End Development
Full Stack Development
Website Development
Desktop Development
Mobile Development
Game Development
Embedded Development
Security Development
My journey into web development began in the vibrant world of front-end development, where I loved turning code into visually appealing, interactive web pages.
Later, I dived into back-end development, uncovering the nuts and bolts that power a website. Learning Python and Ruby, I gained a deeper appreciation for the seamless integration of front-end and back-end.
Whether you’re looking to hire a web developer or become one, you should understand the different types of web development that developers can master.
These different types of web development primarily refer to the different sectors of the profession in which web developers can work. Some of these distinctions overlap, and web developers will often master multiple types of web development.
1. Front-End Development
Front-end developers work on the client- or user-facing side of websites, programs, and software — in other words, what users see. They design and develop the visual aspects, including the layout, navigation, graphics, and other aesthetics.
The main job of these developers is to build interfaces that help users reach their goals. They also often work on the user experience aspect of their projects.
2. Back-End Development
If the front end is what users see, the back end is what they don’t. Back-end web developers work on the servers of websites, programs, and software to make sure everything works properly behind the scenes.
These developers work with systems like servers, operating systems, APIs, and databases and manage the code for security, content, and site architecture. They collaborate with front-end developers to bring their products to users.
3. Full Stack Development
Full stack developers work in both the front-end and back-end sides of a website. They can create a website, application, or software program from start to finish. “Stack” refers to the different technologies that handle different functionalities on the same website, like the server, interface, etc.
Because full stack developers require years in the field to build the necessary experience, this role is often sought after by companies looking to build or update their websites. This developer’s all-around knowledge helps them optimize performance, catch issues before they occur, and help team members understand different parts of a web service.
This comprehensive skill set is typically covered in a full stack developer course. If you want to be well-versed in all things web development, taking one of these courses is a great way to begin.
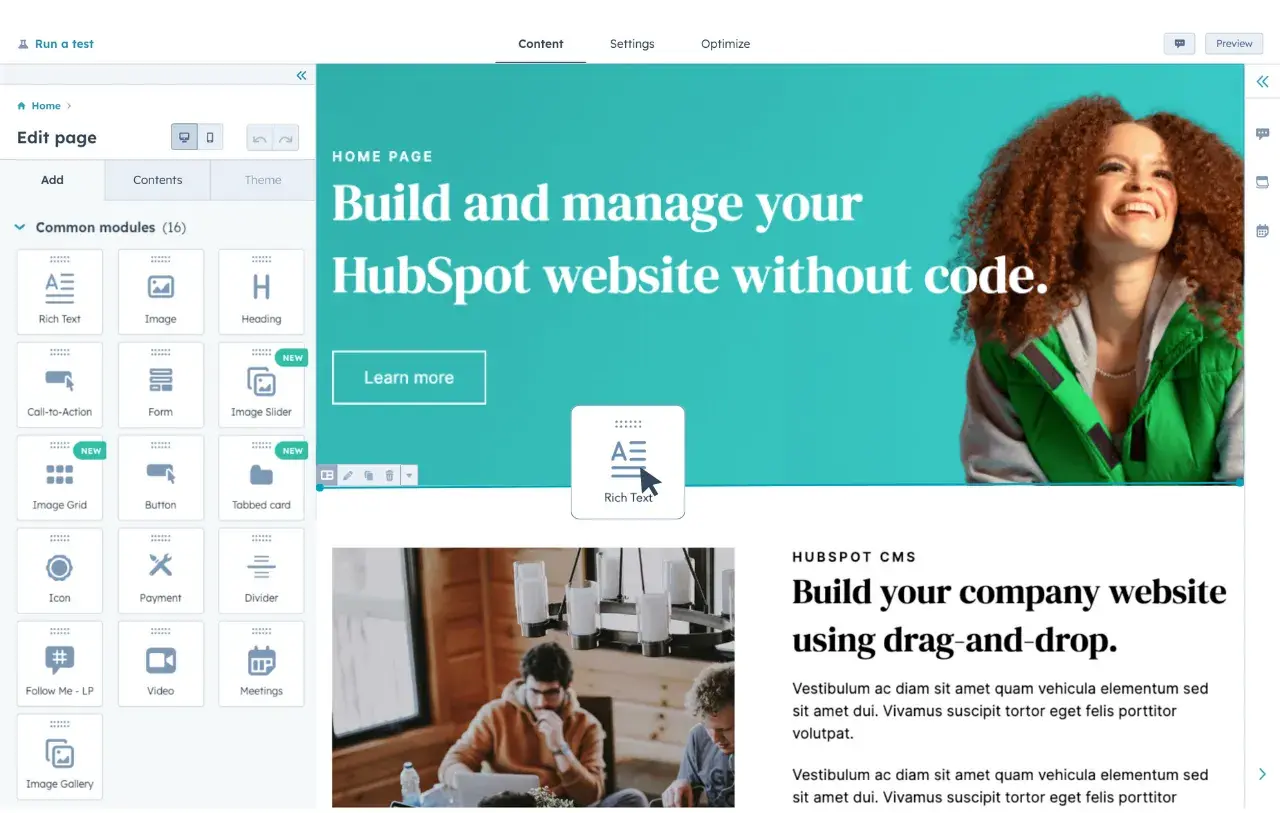
HubSpot’s Free Website Builder
Create and customize your own business website with an easy drag-and-drop website builder.
Website developers can be front-end, back-end, or full stack developers. However, these professionals specialize in building websites, as opposed to mobile applications, desktop software, or video games.
5. Desktop Development
Desktop developers specialize in building software applications that run locally on your device, rather than over the Internet in the web browser. Sometimes, the skill set of these developers overlaps with web developers if an application can run both online and off.
6. Mobile Development
Mobile developers build applications for mobile devices such as smartphones or tablets. Mobile apps operate much differently than other websites and software programs, thus requiring a separate set of development skills and knowledge of specialized programming languages. (Psst: Even if you are not building a mobile application, you should aim to make your website mobile-friendly!)
7. Game Development
Game developers specialize in writing code for video games, including console games (Xbox, PlayStation, etc.), PC games, and mobile games — which means this specialty overlaps somewhat with mobile development.
8. Embedded Development
Embedded developers work with all hardware that isn’t a computer (or, at least, what most of us imagine as “computers” with a keyboard and screen). This includes electronic interfaces, consumer devices, IoT devices, real-time systems, and more.
With a recent rise in interconnected devices — as seen with smart appliances, Bluetooth technologies, and virtual assistants — embedded development is becoming an in-demand practice.
9. Security Development
Security developers establish methods and procedures for securing software programs or websites. They typically work as ethical hackers, trying to “break” websites to expose vulnerabilities without intending harm. They also build systems that discover and eradicate security risks.
Front-End Web Development Languages
As I’ve already discussed, front-end web development focuses on creating the visual and interactive elements of a site. It involves designing and building the user-facing side — what you see, essentially, when you pull up a site in a web browser.
In my perspective, front-end development is likely the “easiest” way to begin a career in web development. That said, as with any other aspect of this field, it will have a learning curve. I’ll discuss this in the next section when I share a general roadmap for getting started with front-end web development.
Here are some of the most popular front-end web development languages. Having an understanding of these will be paramount as a front-end developer.
HTML (Hypertext Markup Language)
HTML is likely the language you first thought of when it comes to web development, and with good reason: HTML is the backbone of any web page. It provides both semantic structure and defines the elements of a website, such as headings, paragraphs, images, and links. Web developers use HTML to give content a proper layout before customizing it.
CSS (Cascading Style Sheets)
If HTML is the backbone of a site, then CSS is the muscle. CSS is responsible for styling the visual appearance of a website. It allows developers to customize colors, fonts, layouts, and other design elements. With CSS, you can also create responsive web pages that adapt to different screen sizes.
While you can always write your own CSS from scratch, there are also lots of CSS frameworks that can help you more quickly and easily style your website.
JavaScript
JavaScript is a dynamic programming language that adds interactive elements to web pages, such as dropdown menus, sliders, forms, and animations.
JavaScript is widely used for client-side scripting (that is, the script runs on the client’s browser and not on the server that hosts the website). JavaScript generally enhances the user experience by making websites more dynamic and engaging.
These languages play a crucial role in creating visually appealing, intuitive, and interactive websites. Don’t underestimate them: A website may have the best back-end structure, but unless the UI is modern, interactive, and user-friendly, it won’t be as appealing to a visitor.
Front-End Web Development Roadmap
Now that you know the common front-end web development languages, I want to put together this information into a front-end web development roadmap that you can follow. Basically, if you want to get started with front-end web development, I would do things in this order.
Understand the basics of how websites work.
Before you begin writing any code, I think it‘s essential to start with learning a bit about how websites and the internet work in general, if you’re not already familiar with these topics. If you don’t understand these basic principles, you will struggle with putting everything together.
Here are some of the basic areas and questions that I think you should focus on:
HTML is the foundation of front-end website development. So, once you’ve covered the basic questions above, I think learning HTML should always be the next stop on your roadmap for front-end web development.
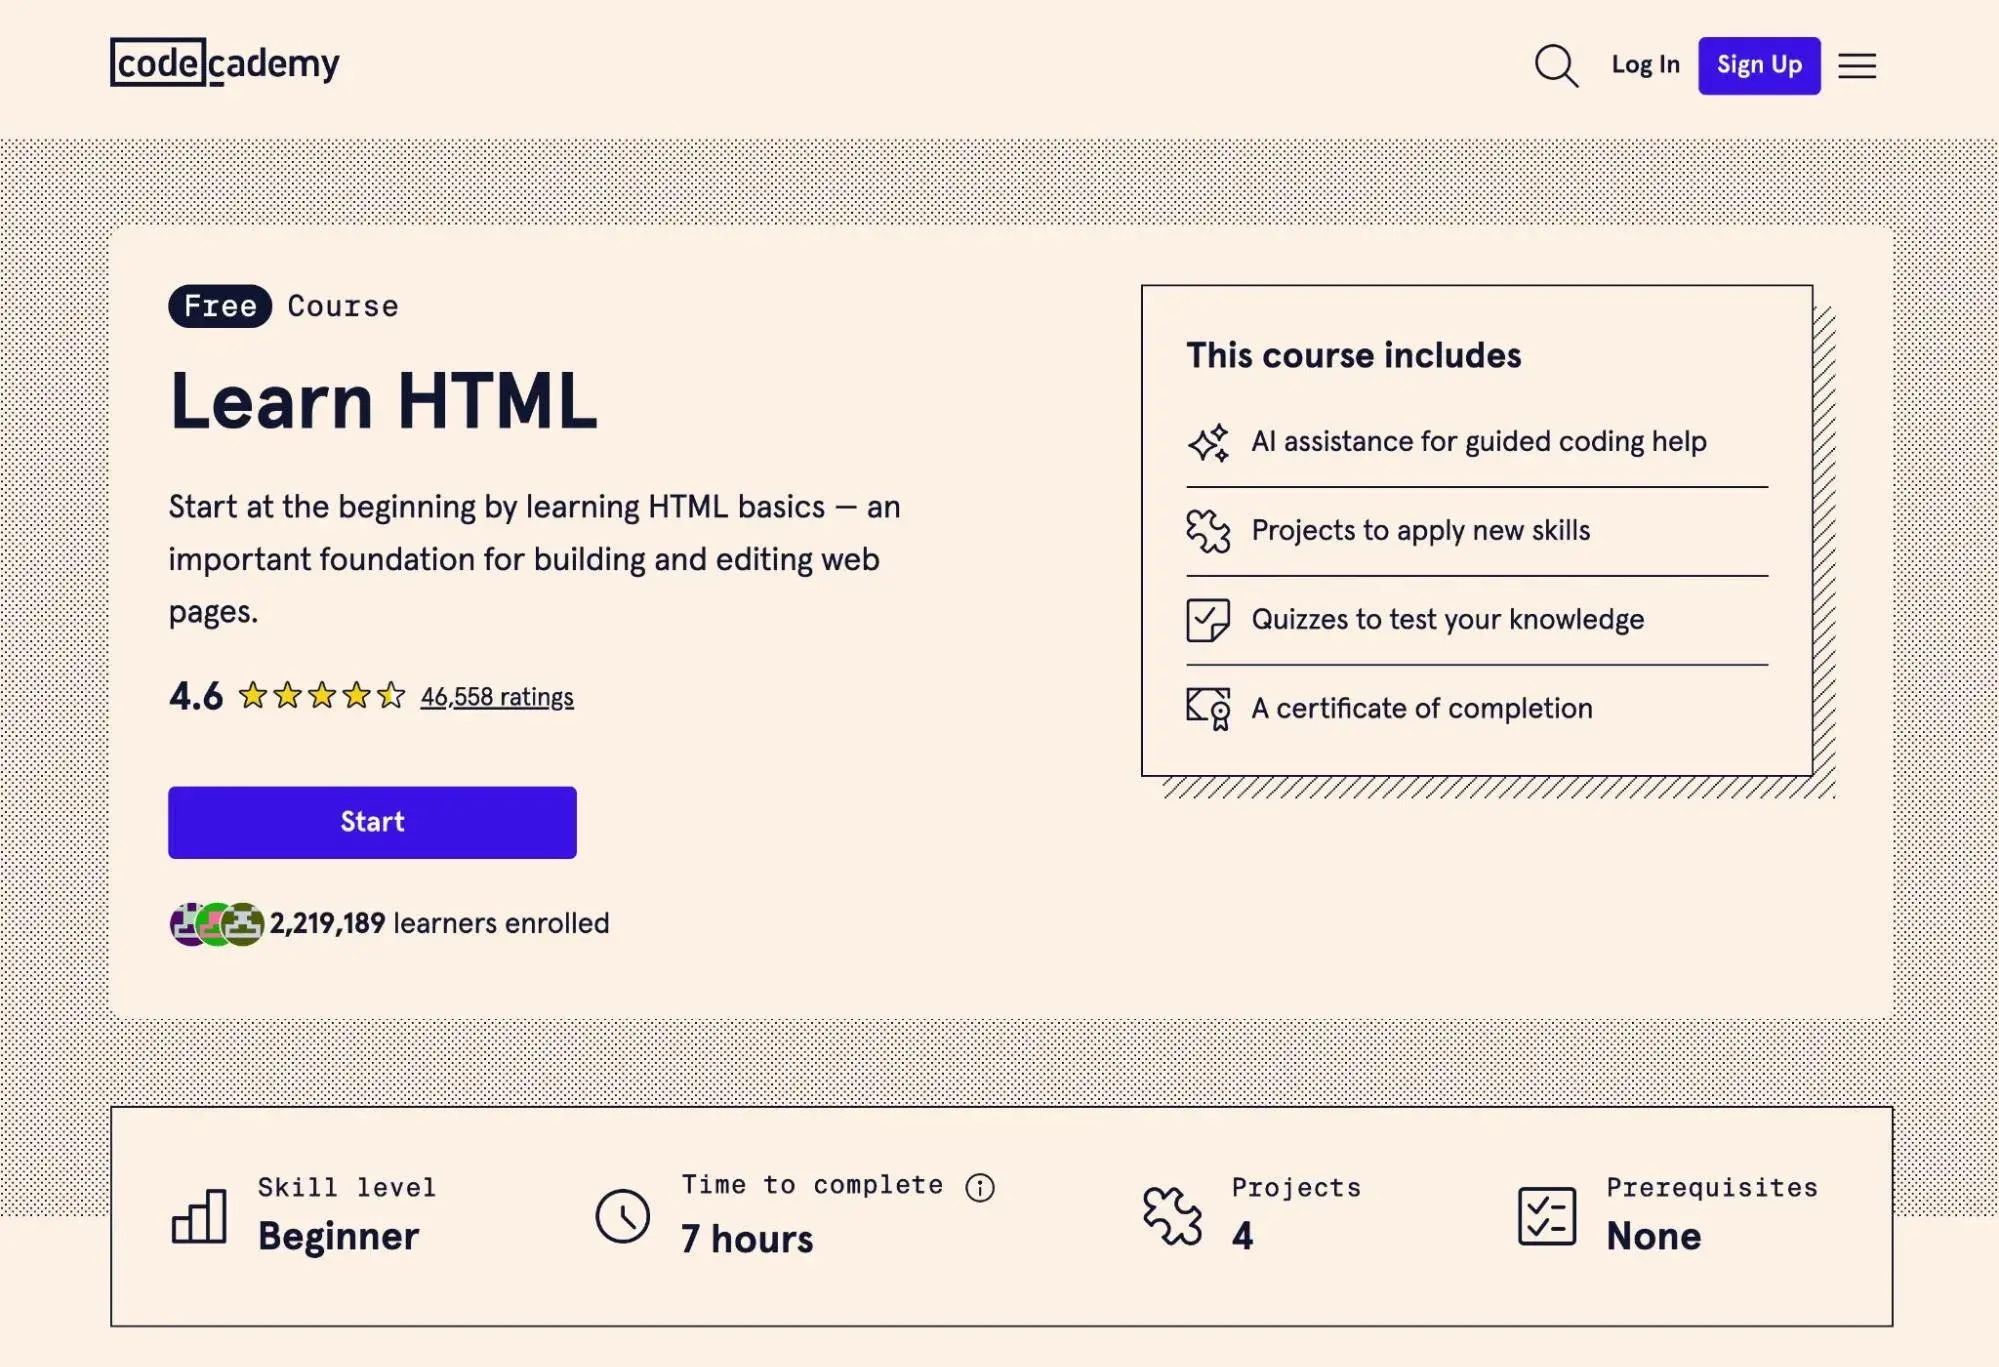
Codecademy also has a nice free HTML course that will take you through all of the important basics. I personally used this when I was getting started with front-end web development.
Use CSS to style your web page.
HTML is the basic foundation of your page. However, to make that HTML actually look good, you need to add CSS.
CSS is one of the most important languages that you‘ll need to know for front-end development, which is why I’ve placed it next on the roadmap.
As with HTML, we have some posts that can help you here. Get started with our ultimate guide to CSS. Then, check out our guides to some specific aspects of CSS. Here are a few of my favorites:
Codecademy also has a free CSS course that pairs nicely with the HTML course. I also took this course when I was just getting started.
You can also use CSS frameworks to work more efficiently. Learning some popular frameworks can really speed up your development and unlock new abilities. I think Bootstrap and Tailwind CSS are good places to start.
Add interactivity with JavaScript.
With just HTML and CSS, you can already build a great-looking website. However, if you want to add interactivity to your site and create a more engaging experience for your visitors, I recommend learning some JavaScript at this time.
Codecademy has a great free course on JavaScript that I think can be a good starting point. It will take you through all of the important basics including conditionals, functions, scope, arrays, and loops.
Deploy your website.
Once you’ve built a basic website with HTML, CSS, and JavaScript, you can deploy your site to make it accessible to people around the world.
If your site doesn‘t have any back-end functionality (which I haven’t covered yet), you can host it pretty much anywhere. I like the free Cloudflare Pages service, but you can find other options. Just upload all the static files to your chosen host, point your domain to it, and you’ve made your first working website.
Expand your knowledge.
Once you feel comfortable working with HTML, CSS, and JavaScript, you should have a strong foundation in front-end web development.
To continue your growth, I recommend expanding your knowledge. Here are a few areas that I think could further benefit your front-end web development journey:
Learn additional front-end languages.
Experiment with different JavaScript and CSS libraries to find some that you like. React is very popular, so I think it’s a great starting point.
Learn a version control system like Git.
Learn some back-end development to build more advanced websites.
Consider working with off-the-rack content management systems like HubSpot Content Hub, WordPress, Webflow, and so on. These might require learning some platform-specific things, such as how to code WordPress themes.
HubSpot’s Free Website Builder
Create and customize your own business website with an easy drag-and-drop website builder.
While front-end developers focus on creating the user-facing elements of a website, back-end developers work behind the scenes to ensure everything runs smoothly. Without back-end developers doing so, front-end developers wouldn’t be able to go in and get their job done.
As opposed to altering the user-facing side, from my experience, back-end development languages help programmers manipulate servers, databases, and software that power websites and apps. That makes it a little harder than learning front-end development.
Here are some of the most common back-end web development languages.
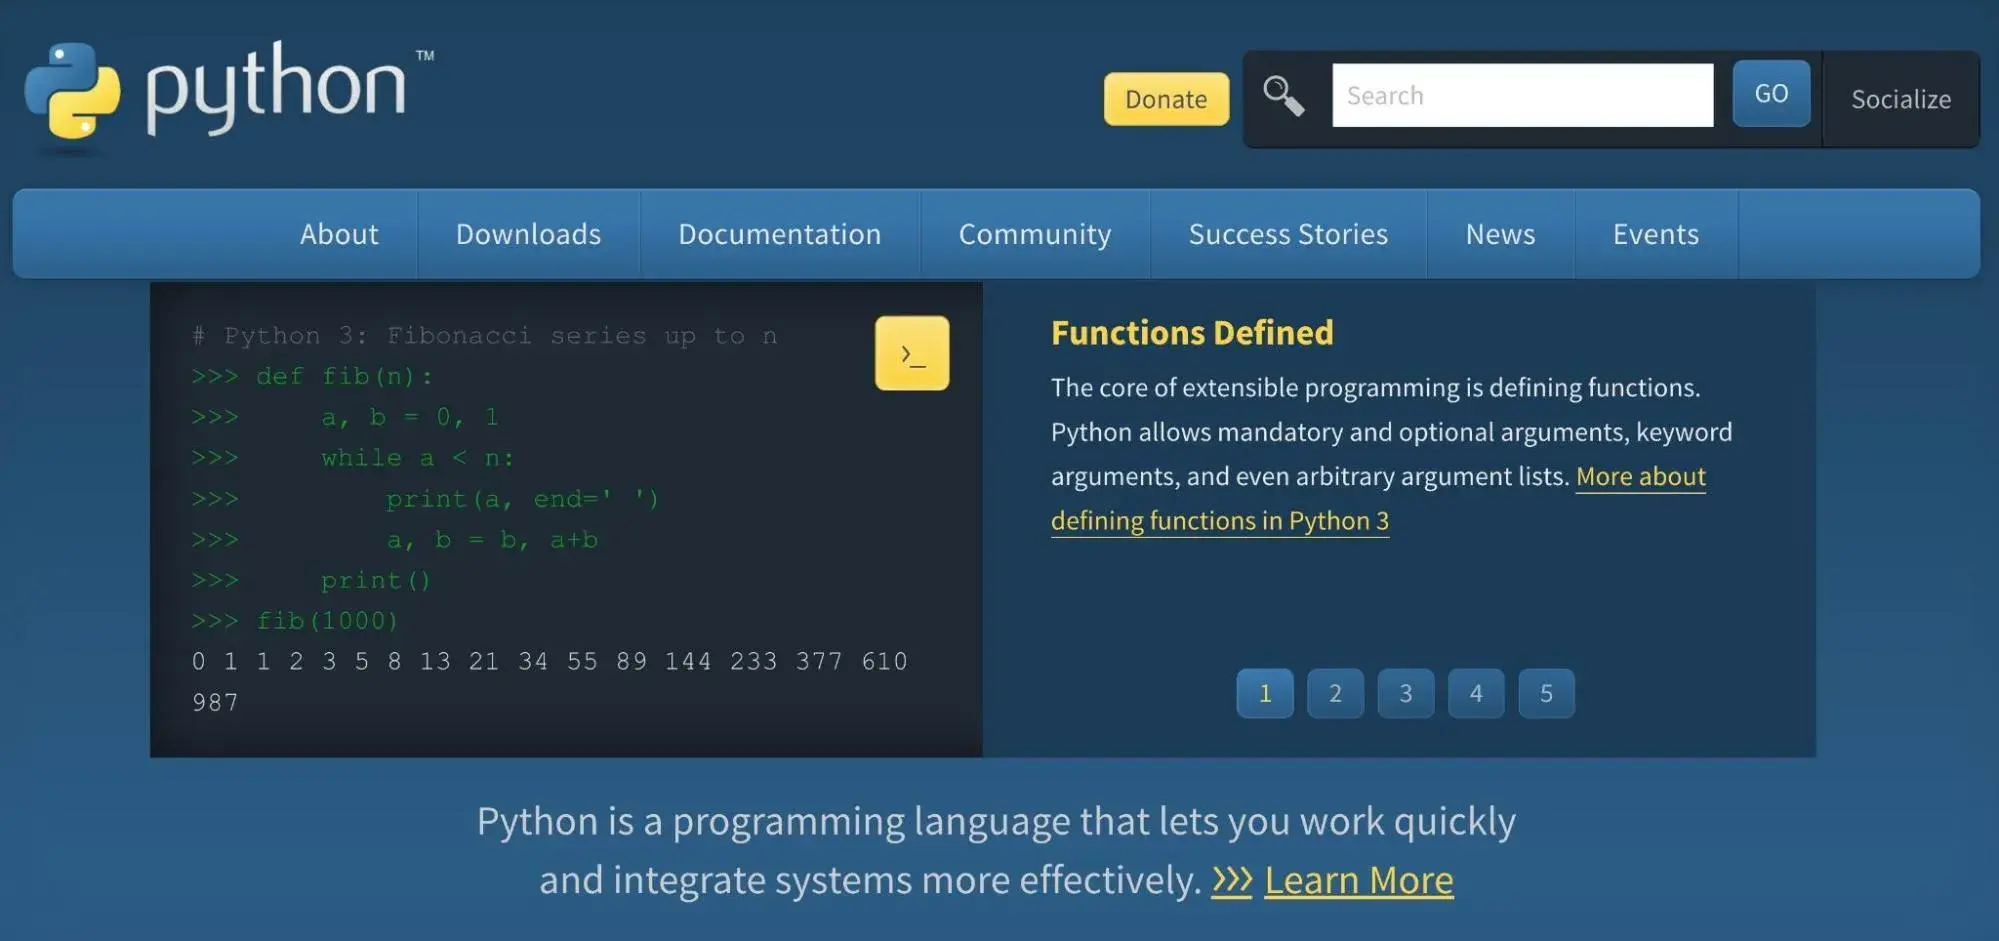
It offers a wide range of frameworks, such as Django and Flask, that simplify back-end development tasks like database management and handling HTTP requests. Python’s extensive libraries and frameworks make it a popular choice among back-end developers.
In addition to back-end development, Python also has a ton of other use cases for automation, data analysis, and more. I think this makes it one of the most versatile back-end development languages to learn.
PHP
PHP is a widely used server-side scripting language specifically designed for web development. It seamlessly integrates with HTML and provides powerful features for handling databases, generating dynamic content, and interacting with web servers.
Popular PHP frameworks like Laravel and Symfony enhance productivity and maintainability for complex web applications. WordPress also relies heavily on PHP, so I recommend starting with this language if you want to work with WordPress.
Ruby
Ruby is a dynamic and object-oriented programming language that prioritizes simplicity and readability. It is most commonly associated with the Ruby on Rails framework, which provides a structure for building robust and scalable web applications.
Ruby’s elegant syntax and extensive ecosystem make it a preferred choice for web development projects.
Java
Java is a versatile and widely used programming language known for its platform independence and scalability.
It is commonly used for building enterprise-level web applications that require high performance and security. Java frameworks like Spring and Hibernate offer tools for building complex back-end systems with ease.
C#
C# (pronounced C-sharp) is a modern, general-purpose programming language developed by Microsoft. It is primarily used for building Windows desktop applications and web services.
With the rise of the .NET framework, C# has gained popularity as a back-end language for developing scalable and secure web applications.
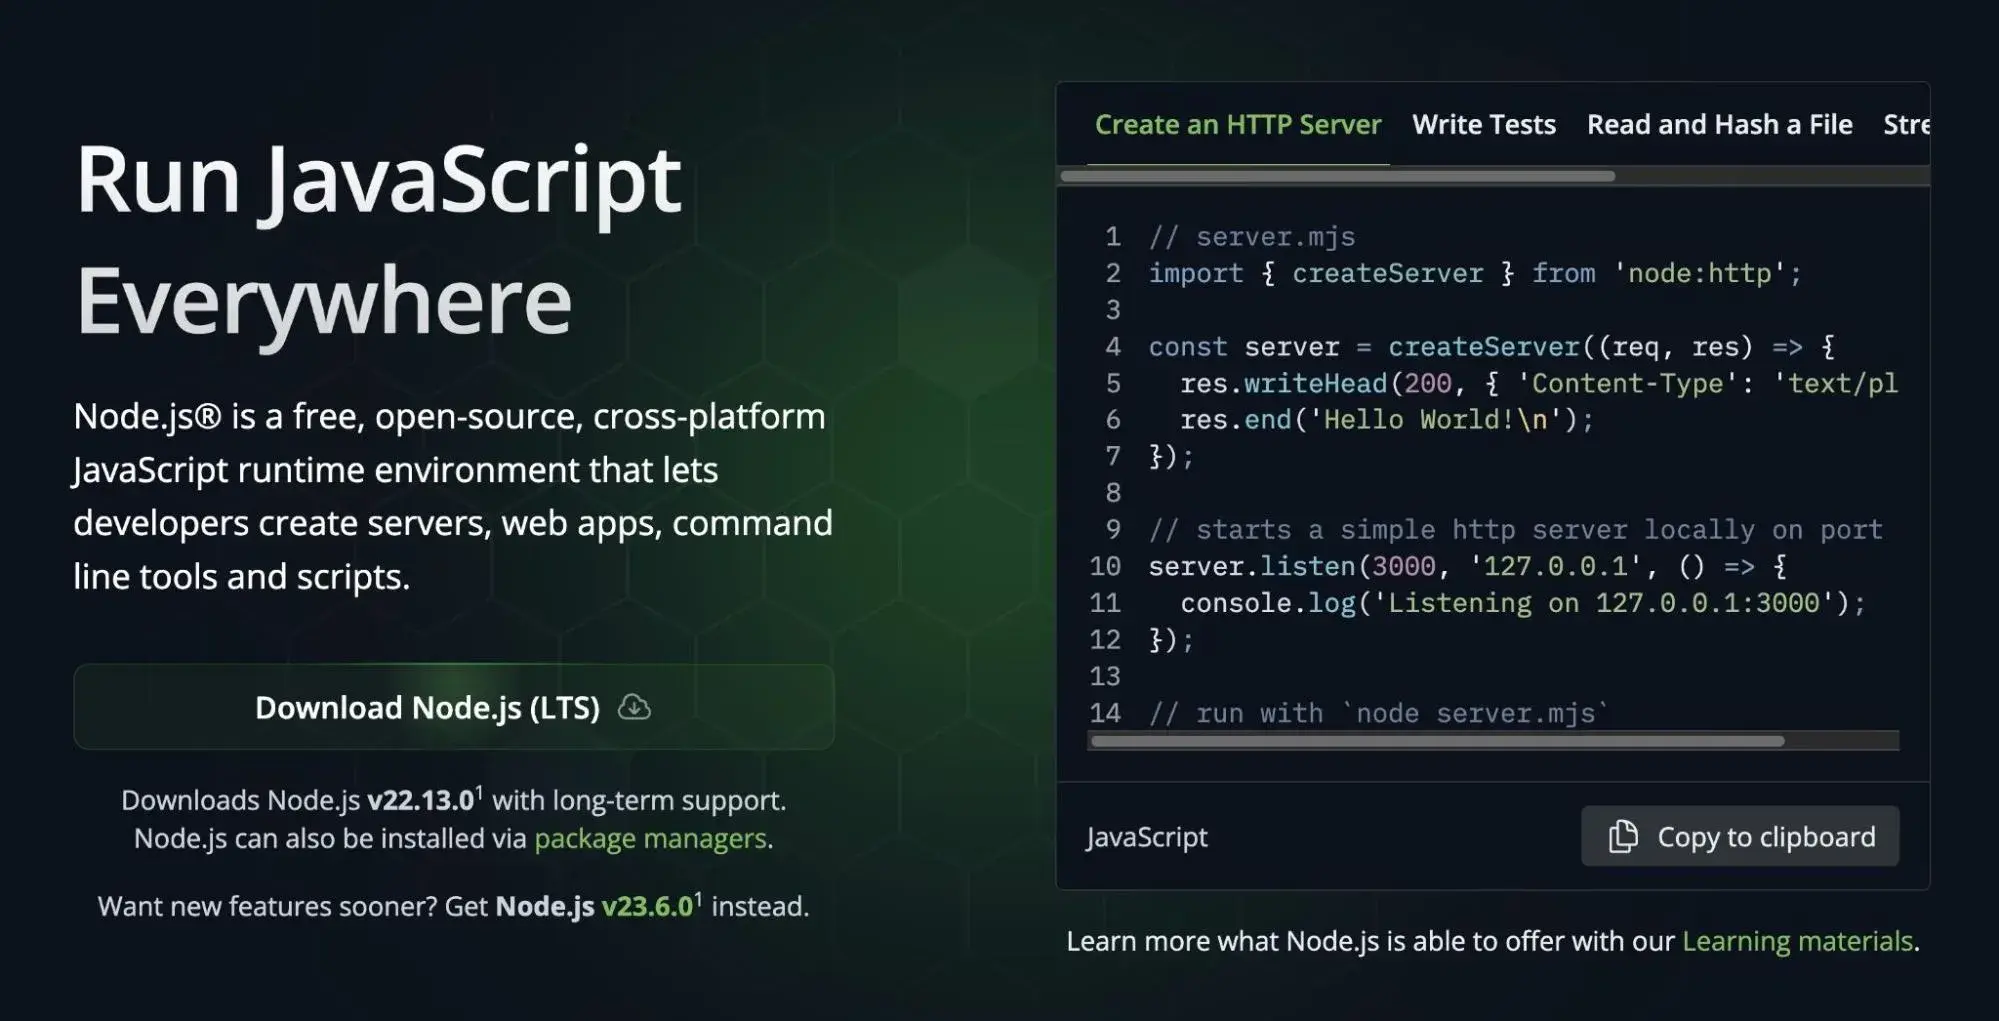
Node.js
Node.js is a JavaScript runtime (that is, the environment where your JavaScript code executes) built on Chrome’s V8 JavaScript engine. It allows developers to run JavaScript code on the server side, opening up opportunities for full stack JavaScript development. Node.js is highly scalable, efficient, and ideal for building real-time applications and APIs.
Remember, back-end developers need to have a solid understanding of databases, server management, and web security, in addition to their language proficiency. That’s why back-end development is generally harder than front-end development, but it’s still learnable nonetheless.
Back-End Web Development Roadmap
As with front-end development, I now want to combine these ideas into a rough back-end web development roadmap that you can follow to get up and running.
Because back-end development can be a little more complex than front-end development (don’t hurt me, front-end developers!), this roadmap will look a little more complex than the front-end development roadmap.
Learn how the internet works.
Before you can jump into backend development, I recommend spending some time learning how the internet works at a basic level. If you don‘t understand these fundamental principles, you’ll struggle with everything else involved with back-end development.
You’ll want to be able to answer a lot of the same questions as those I put on the front-end roadmap, along with some additional focus on topics like how APIs work:
You’ll probably revisit a lot of these topics at various points, but starting with at least a basic understanding is important.
Choose a language and framework to get started.
Next, you‘ll want to choose a backend language that you’ll use when getting started.
Going forward, you‘ll want to learn additional languages to improve your skills. However, when you’re just getting started with backend development, I recommend choosing one language and sticking with it. You can also choose a framework to help you work more effectively. For example, you could use JavaScript and Node.JS, PHP and Laravel, or Python and Django.
Again, if you ever want to work with WordPress websites, I recommend starting with PHP. If you want to build your own web apps, you can consider the other languages.
Learn about version control and repo hosting.
Version control and repo hosting can be important for both front-end and back-end development. However, I think these topics are especially useful for back-end development, which is why I’ve given them their own place on the roadmap.
Version control helps you control, track, and organize different versions of your back-end projects. Git is definitely the best-known and most popular version control system, but there are also other options like SVN and Mercurial.
To make it easier to access and manage your version control system, you can use a service like GitHub, or alternatives like GitLab and Bitbucket.
Learn about databases.
To store your website’s data, your project will need some type of database.
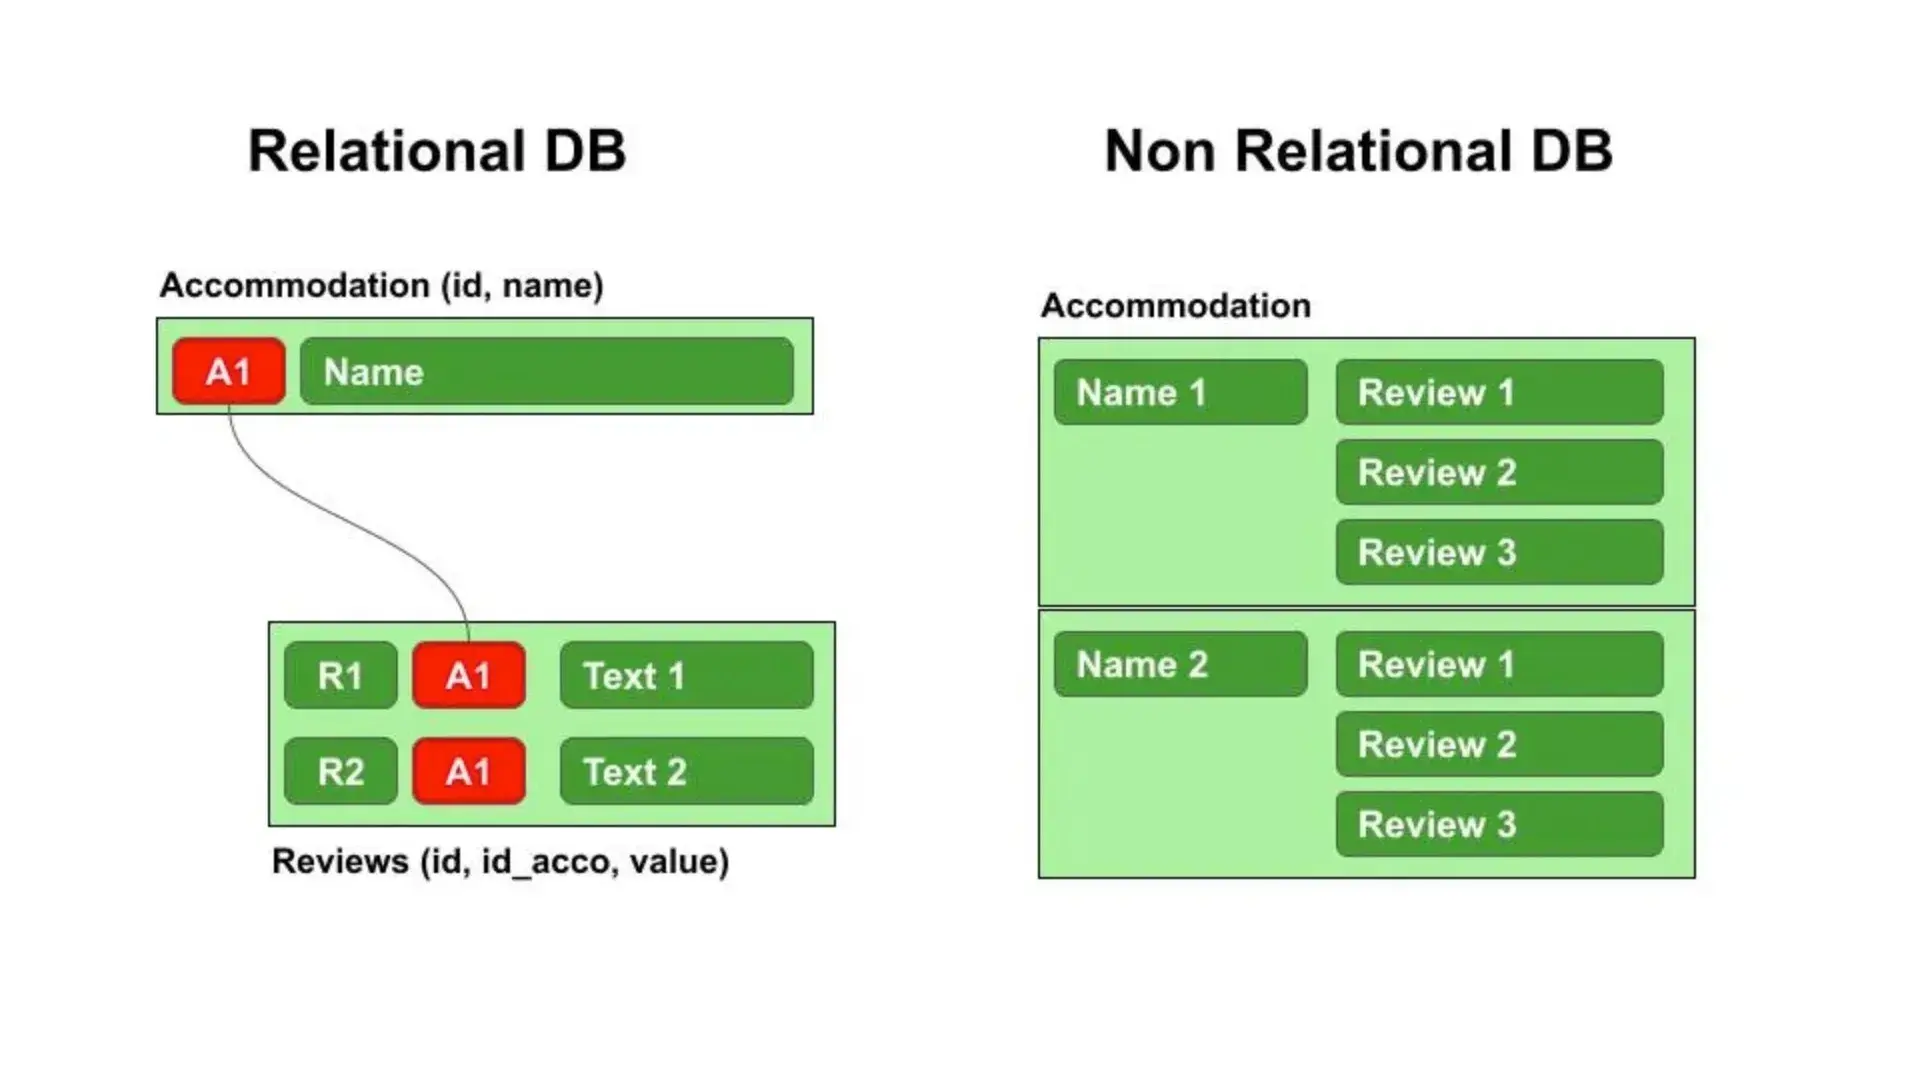
There are two main types of databases:
Relational databases like MySql, SQLite, PostgreSQL, and others.
Non-relational databases (NoSQL) like Mongo DB, Redis, and others.
When you’re just getting started with back-end web development, I recommend beginning with relational databases. In general, unless you have a specific reason for using a non-relational database, you should start with relational databases as your default choice.
However, it will also be important to learn about non-relational databases in the future. You can check out our guide on database schemas to start your journey.
You also might want to learn some SQL so that you understand how to query information from the database.
Learn about APIs.
An API, short for Application Programming Interface, can help you connect data in your database with the front end of your website. As such, they‘re an essential part of building functional web applications, even if you don’t handle the front-end development yourself.
To enhance your knowledge, I recommend learning about the following topics and technologies:
If you want to be successful in back-end development, you‘ll need to be able to build secure applications. Once you’ve mastered the basics, you need to learn about various security principles so that you can apply them to your work.
Understanding how testing works for back-end development is essential, especially once you start working on real projects that are in production. Here are some common types of tests that you’ll want to learn about:
Integration testing — making sure different components will work together as they should.
Unit testing — testing individual components in isolation.
Functional testing — testing to make sure the requirements for function are met.
Learn how to deploy your web apps.
At this point in your journey, I think you’re now ready to learn about deployments, including containerization and virtualization. You should also learn how web servers work, including popular options like Apache and Nginx.
You also might want to learn about popular cloud platforms, as these can be unique in their own ways. Here, I’m talking about platforms like Amazon Web Services (AWS), Google Cloud Platform, Microsoft Azure, and so on.
Of course, your back-end development journey will still continue past this.
For example, once you‘ve deployed, you’ll be in a constant battle to optimize performance and improve scalability.
To accomplish that, you’ll need to learn about caching, indexes, load balancers, microservices, and lots more. Focusing on scalability will be especially important if you ever want to start working on larger projects. But if you follow this roadmap, you should be off to a good start and on track to achieve your goals.
The Website Development Process
Early on as a web developer, I remember tackling projects without a clear process in place. It felt like trying to assemble a puzzle without having the picture on the box.
It wasn’t until I started working on a complex ecommerce site that the importance of a structured approach really hit home. The project demanded a mix of front-end and back-end development, each with its specific languages and frameworks.
By establishing a clear process, breaking down tasks, and systematically approaching each phase, the project became manageable and even enjoyable. Trust me, developing a robust process is not just helpful; it’s essential.
Here are some key steps I found most helpful in my website development process journey.
HubSpot’s Free Website Builder
Create and customize your own business website with an easy drag-and-drop website builder.
Before laying pen to paper or hands to keyboard, it’s vital to first connect with teams and personnel across your organization to develop a plan for your website.
Here are some questions to consider before your first site draft:
What is the goal of your website?
Who is your audience, and what do you want them to do on your website?
What type of website are you building (e.g., basic information, membership, online store)?
What content are you aiming to publish, and at what volume?
What’s the purpose of this content?
How will you structure your website for the best navigational experience?
What’s your budget?
Answering the questions requires interfacing with your web development, marketing, and financial teams to determine your priorities and make informed decisions.
Put simply? It’s much easier to create a roadmap at the beginning of the process than reverting your progress at a roadblock.
It‘s especially important that your entire team is on the same page, so be sure to chat with members of your team you need to work with to make sure there’s a sense of connection there.
2. Create a wireframe.
All good websites start with a blueprint. Developers call this a wireframe. It doesn’t have to be an official document; it’s simply a vision for your site that’ll give both you and your developer(s) direction and a place to start. You can draw it on a whiteboard or use a tool like Figma, Slickplan, or Mindnode.
Wireframes are strictly visual tools that will help you understand where text and images will go on individual web pages. You can use blank boxes and “dummy text” to get an idea of how your content will show up on the front end. If you‘re working with a company or freelancer, I’d recommend creating a wireframe so you have an idea of what your final product will be.
3. Draft up a sitemap.
Next, it’s time to create a sitemap (not to be confused with sitemap.XML, which is an XML file that helps search engines crawl and find your site). Just like a business plan gives a potential investor insight into your goals and deliverables, a sitemap gives a developer the information needed to meet your vision. You can create your sitemap on your own or work with your developer(s).
Here are a few questions to ask yourself when planning your site:
What individual pages do you want?
What content will be on those pages?
How can you organize those pages into categories?
What is the hierarchy of pages on your site?
How will the pages link together?
What pages and categories are essential to your site and user experience?
Which pages or categories could be removed or combined?
Again, it’s a good idea to consult with other teams within your organization. If you have an SEO and/or content strategy team, their input will be critical in the linking structure and categorizing of your pages.
4. Build the back end of your website.
Writing code might be one of the more complicated parts of web development, but it’s hardly the only component. You also have to build your back-end and front-end site structures and design. Let’s start with the back end.
The back end handles the data, which enables functionality on the front end. For example, Facebook’s back end stores my photos so that the front end can then allow others to look at them. It’s made up of two key components:
Databases are responsible for storing, organizing, and processing data so that it’s retrievable by server requests.
Servers are the hardware and software that make up your computer. Servers are responsible for sending, processing, and receiving data requests. They’re the intermediary between the database and the client/browser. The browser will, in effect, tell the server, “I need this information,” and the server will know how to get that information from the database and send it to the client.
These components work together to build the foundation for each website.
As for building your website, backend developers will establish three things:
Your logic code, which is a set of rules for how your website will respond to certain requests and how objects of your website will interact.
Your database management, which is how your website will organize, manage, and retrieve its data.
Your infrastructure, which is how your site will be hosted. Hosting your own site will give you greater control, but it’s much more expensive and requires you to maintain your own server health and security.
Alternatively, managed hosting providers like Kinsta or WP Engine can simplify this process by handling your site’s infrastructure, optimizing performance, and ensuring security updates are taken care of automatically.
With these components and decisions in place, your website will be ready for front-end development.
Note: The back-end is slightly tangential to web development because you don‘t always need a back-end if you’re not storing any data. “Data” in this context means any user-entered information that you need to save and persist.
Think about logging in to a website. If the website doesn’t have a back-end, how could it remember your login information or profile settings? You need a back-end to get this information.
Facebook, for example, needs to know who is on your Friends list, what events you have joined, what posts you have created, and more. This is all “data” that lives in a database. If they didn’t have a back-end with a database, none of that data would be accessible to them.
On the other hand, a website that’s purely informational and doesn’t require the users to enter any data wouldn’t need a back-end.
So, if you have no data, you don’t necessarily require back-end development. But that’s not saying you shouldn’t learn the basics. You never know when you might need it.
5. Build the front end of your website.
If you’ve ever dabbled in web design or toyed with a website in WordPress, Squarespace, or Google Sites, you’ve touched front-end web development.
The front-end stuff is important — it’s what your visitors, customers, and users see and how they’ll use your website.
Front-end (or client-side) development includes a combination of JavaScript, HTML, and CSS. It also controls components such as typography and fonts, navigation, positioning, and browser compatibility and responsiveness. This part will reflect more of your initial site vision and what you included in your wireframe.
As technology and consumer preferences change, client-side coding tends to become outdated much faster than back-end development. This is where coding resources (like the ones we’ve included below) come in handy.
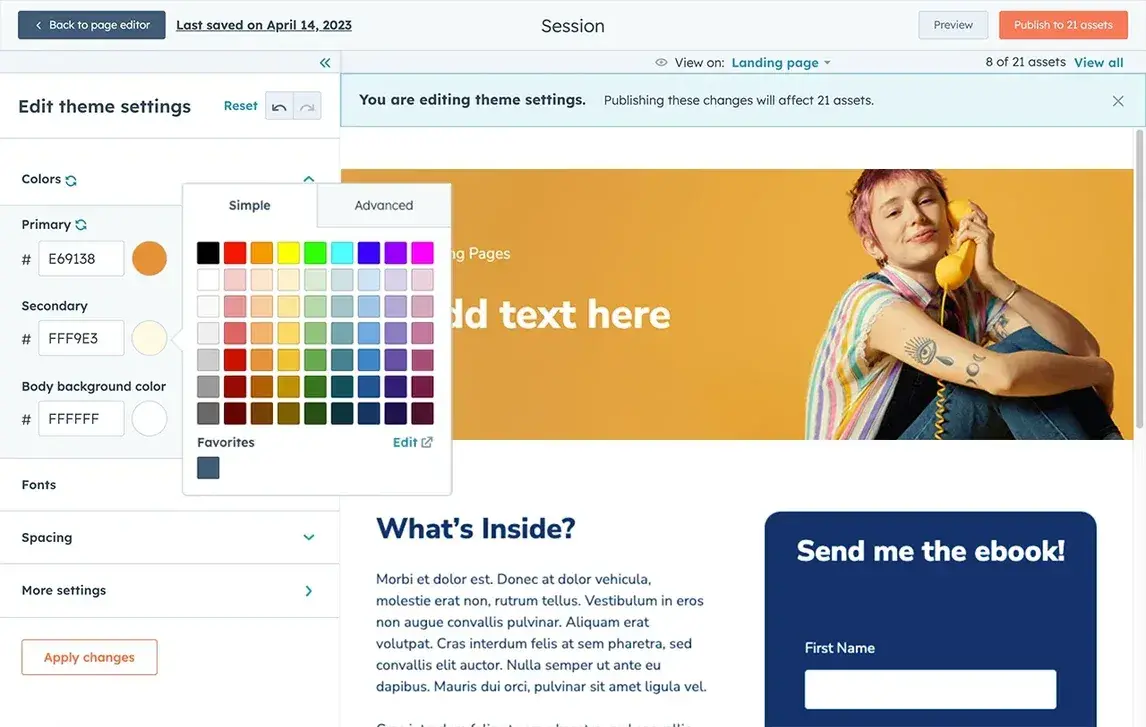
6. (Optional) Work with a CMS.
Why would someone choose a CMS over coding “by hand” or “from scratch?” It’s true that a CMS is less flexible and, therefore, gives you less control over your front end.
However, a CMS is easier to use (you have to write less code), and it often has tools for hosting the site, creating your website, storing user information, creating a blog, publishing landing pages, capturing leads, and even building an email list. As a result, you’ll be able to make your website more profitable with less than half the work.
CMS options often include plugins that remove the need to write a back end. For example, there are WordPress plugins for ecommerce. So, instead of building a complicated back-end to charge customers’ credit cards, you can just use an existing plugin and avoid the need to deal with databases and server-side code.
At this point, your website will have an IP address. It also needs a domain name, which is a memorable website name that your visitors can use to find your site. You‘ll also have to make sure the domain name you want to use isn’t already in use.
Perhaps you’ve heard of sites like GoDaddy and Hover. These services help you purchase a domain name and register with ICANN (Internet Corporation for Assigned Names and Numbers). Most domain registrations are good for a year before you’re required to renew.
Make sure to address all the legal requirements for an online website, such as displaying a privacy and cookie policy. Compliance plays a vital role in preventing potential legal issues, but it is often overlooked.
Website Development Resources
One thing I’ve learned is that continuous learning is key. When I hit a roadblock on a tricky coding problem, I discovered the wealth of online resources available.
Outside of connecting and networking with other developers, there are plenty of resources you can tap into to further your understanding of web development.
Docker Compose is a tool provided by Docker that simplifies the process of defining, managing, and orchestrating multi-container Docker applications. It allows developers to use a single YAML file to configure the services, networks, and volumes required for their application, making it easier to define and manage complex containerized environments.
At its core, Docker Compose is designed to streamline the development and deployment of containerized applications by providing a simple and intuitive way to define and manage multi-container Docker environments. By encapsulating application dependencies, configurations, and services within a single YAML file, Docker Compose eliminates the need for developers to manually configure and manage each individual container, simplifying the process of working with complex distributed systems.
One of the key features of Docker Compose is its ability to define and manage multiple interconnected containers as part of a single application stack. This makes it easy to define the relationships and dependencies between different services, such as databases, web servers, and application components, and ensure that they are properly orchestrated and scaled together.
Additionally, Docker Compose provides a set of powerful commands for managing Docker containers and services, including commands for starting, stopping, and scaling services, as well as for viewing logs and executing commands within containers. This makes it easy to manage the entire lifecycle of a Dockerized application from development through to production deployment.
Docker Compose is a valuable tool for developers and DevOps teams looking to streamline the process of working with Docker containers and orchestrate complex multi-container applications. Its simplicity, flexibility, and powerful features make it an essential component of the Docker ecosystem and a valuable tool for building and deploying modern, cloud-native applications.
What is Docker Compose command not found error?
The “Docker Compose command not found” error indicates that the system is unable to locate the Docker Compose executable. This can be due to Docker Compose not being installed on the system, an incorrect configuration of the system’s PATH environment variable where Docker Compose is located, insufficient permissions to execute the Docker Compose command, an incomplete installation of Docker Compose via a package manager, or a Windows-specific issue where Docker Compose is not automatically added to the PATH environment variable during installation.
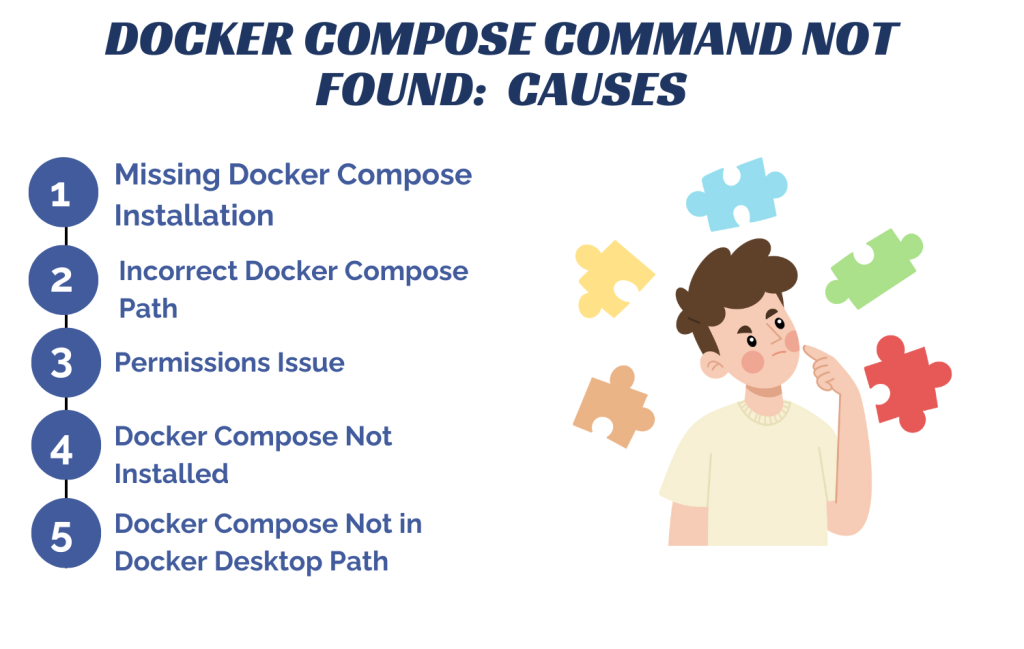
Docker Compose Command Not Found: 5 Possible Causes with their Solutions
Encountering the “Docker Compose command not found” error can be frustrating, but fear not! Below are five potential causes, along with detailed explanations and corresponding fixes to get you back on track:
1. Missing Docker Compose Installation:
Cause: Docker Compose might not be installed on your system. This could occur if you haven’t installed it yet or if the installation process encountered errors.
Fix: Install Docker Compose using the official installation guide for your operating system. This typically involves downloading the Docker Compose binary and ensuring it’s accessible in your system’s PATH.
Cause: The Docker Compose binary might not be located in a directory listed in your system’s PATH environment variable. Without the correct PATH configuration, your system won’t recognize the Docker Compose command.
Fix: Add the directory containing Docker Compose to your PATH environment variable. This allows your system to locate the Docker Compose binary when you execute the command.
export PATH=$PATH:/usr/local/bin
3. Permissions Issue:
Cause: You might not have sufficient permissions to execute the Docker Compose command. This can occur if the Docker Compose binary lacks executable permissions.
Fix: Ensure that Docker Compose has the necessary executable permissions. You can do this by adjusting the file permissions using the `chmod` command.
sudo chmod +x /usr/local/bin/docker-compose
4. Docker Compose Not Installed via Package Manager:
Cause: If you previously installed Docker Compose using a package manager (such as apt on Ubuntu), but the installation was incomplete or encountered errors, the Docker Compose command may not be recognized.
Fix: Remove the package manager-installed Docker Compose and reinstall it using the official installation method provided by Docker.
sudo apt-get remove docker-compose
5. Docker Compose Not in Docker Desktop Path (Windows):
Cause: On Windows systems with Docker Desktop installed, Docker Compose might not be automatically added to the PATH environment variable during installation.
Fix: Manually add the directory containing Docker Compose to the PATH environment variable through the system settings on Windows.
Conclusion
Navigating the “Docker Compose command not found” error is an essential skill for developers and DevOps practitioners working with Docker Compose. By understanding the potential causes behind this error, such as missing installations, PATH misconfigurations, permissions issues, incomplete installations, or Windows-specific quirks, and implementing the corresponding fixes outlined in this guide, users can swiftly overcome obstacles and resume their Docker Compose workflows with confidence.
With Docker Compose serving as a powerful tool for simplifying the management and orchestration of multi-container applications, mastering its nuances ensures smoother development, deployment, and maintenance processes in the containerization journey.
Armed with the knowledge gleaned from this guide, users can navigate through errors more effectively, unlocking the full potential of Docker Compose in their projects.
The Bangalore real estate market is booming due to an increase in demand for residential as well as commercial properties. The use of digital marketing has become a very effective tool when it comes to attracting potential buyers and investors in today’s competitive market. A strong online presence is important for real estate developers, agents, and property consultants.
A list of four effective digital marketing tips for real estate marketing in Bangalore is provided below.
Create a high-quality website
Use Social Media Marketing
Use Google Ads and Local SEO
Email and WhatsApp Marketing
1. Create a high-quality website
Your website serves as your digital showroom. The website should be visually appealing, easy to use, and mobile-friendly. You should ensure that your website includes:
High-resolution images and videos of properties.
Clear property descriptions with price, location, and amenities.
A contact form and live chat option for instant inquiries.
SEO-optimized content with relevant keywords like “Bangalore real estate” and “apartments for sale in Bangalore.”
A fast loading speed improves the user experience and SEO ranking.
A well-structured website increases credibility and attracts potential buyers searching for properties online.
2. Use Social Media Marketing
Social media platforms like Facebook, Instagram, and LinkedIn play an important role in real estate marketing. To maximize engagement:
Post high-quality images and video walkthroughs of properties.
Share success stories and testimonials from happy buyers.
Run targeted ads based on location, age, and interest to reach the right audience.
Engage with your followers by responding to queries and comments immediately.
Platforms like YouTube and Instagram Reels are effective for showcasing property tours, making them more appealing to buyers.
3. Use Google Ads and Local SEO
Google Ads can drive instant traffic to your listings, while local SEO ensures your business appears in search results when users look for real estate in Bangalore. Here’s how you can optimize your strategy:
Run Google Ads with targeted keywords like “luxury apartments in Bangalore” or “plots for sale near Electronic City.”
Claim and improve your Google My Business listing.
Encourage satisfied customers to leave positive Google reviews.
Create blog posts with local keywords and property-related queries.
Using these strategies can attract more leads and improve your online visibility.
4. Email and WhatsApp Marketing
Email and WhatsApp marketing help communicate directly with potential buyers. You can maximize its benefits by following these steps:
Send personalized property recommendations to interested buyers.
Keep you informed about new project launches and exclusive offers.
Use automated email campaigns to generate leads.
WhatsApp marketing is quick property updates and customer engagement.
This approach keeps your audience informed and interested in your real estate projects.
Conclusion
The marketing of real estate in Bangalore requires a strong digital presence to attract buyers in a highly competitive market. By building a high-quality website, utilizing social media, using Google Ads and SEO, and engaging with potential buyers through email and WhatsApp marketing, you can increase your chances of closing more deals. Implement these strategies today and watch your real estate business grow!
Feel free to contact us if you need expert guidance on digital marketing for real estate.
Jenkins is an open-source automation server facilitating continuous integration and delivery pipelines. Its user-friendly interface and extensive plugin ecosystem empower teams to automate building, testing, and deployment of software
Key Features of Jenkins:
It automate the integration of code changes into a shared repository.
It define CI/CD pipelines using code, enabling version control and reproducibility.
It customize workflows with a vast array of plugins for seamless integration with other tools and technologies.
2. Ansible
Ansible is an open-source automation tool used for configuration management, application deployment, and orchestration. It simplifies complex tasks with its agentless architecture and declarative language.
Key Features of Ansible:
No agents required on managed nodes, reducing overhead and simplifying setup.
It define tasks and configurations in YAML format for easy readability and maintenance.
It ensure consistent system state by only making necessary changes.
3. Docker
Docker is a popular containerization platform that enables developers to package, distribute, and run applications in lightweight, portable containers.
Key Features of Docker:
It isolate applications and their dependencies into containers for consistency and reproducibility.
It run containers on any infrastructure, from local development environments to cloud platforms.
It utilize system resources efficiently by sharing the host OS kernel across containers.
4. Kubernetes
Kubernetes(K8s), is an open-source container orchestration platform that automates the deployment, scaling, and management of containerized applications.
Key Features of Kubernetes:
It automate the deployment, scaling, and management of containers across clusters of hosts.
Automatically route traffic to containers and distribute load across the cluster.
Automatically restart containers that fail and replace containers that do not respond to health checks.
5. Puppet
Puppet is a configuration management tool that automates the provisioning, configuration, and management of IT infrastructure.
Key Features of Puppet:
It define desired system states using Puppet’s domain-specific language (DSL) for easy configuration management.
It track and report on changes made to infrastructure configurations for compliance and auditing purposes.
It manages configurations across a variety of operating systems and cloud environments for flexibility and scalability.
6. Chef
Chef is a powerful configuration management tool that automates the deployment, configuration, and management of infrastructure.
Key Features of Chef:
It define infrastructure configurations using Chef’s domain-specific language (DSL) or Ruby for version-controlled, repeatable deployments.
It operate in a client-server model where Chef clients run on managed nodes and communicate with a central Chef server.
It organize configuration code into reusable components called “recipes” and “cookbooks” for modular and scalable infrastructure management.
7. Terraform
Terraform is an open-source infrastructure as code (IaC) tool that enables users to define and provision infrastructure resources using declarative configuration files.
Key Features of Terraform:
It define infrastructure resources and their configurations using Terraform’s domain-specific language (DSL) or HashiCorp Configuration Language (HCL).
It automatically provision, manage, and update infrastructure resources across multiple cloud providers and on-premises environments.
It track the state of infrastructure resources and manage changes to configurations to ensure consistency and reliability.
Built-in Git repository management with branching, merging, and code review capabilities.
Automated testing and deployment pipelines integrated directly into the platform for streamlined software delivery.
Built-in issue tracking system for managing tasks, bugs, and feature requests.
9. CircleCI
CircleCI is a continuous integration and continuous delivery (CI/CD) platform that automates the software development process.
Key Features of CircleCI:
Easily scale CI/CD pipelines to meet the needs of small teams to large enterprises.
Hosted solution that requires no infrastructure setup or maintenance.
It define workflows and pipelines using YAML configuration files for easy version control and reproducibility.
10. Travis CI
Travis CI is a popular continuous integration and continuous deployment (CI/CD) platform that automates the software development lifecycle.
Key Features of Travis CI:
Hosted solution that eliminates the need for managing infrastructure, enabling quick setup and deployment.
Seamless integration with GitHub repositories for automatic builds triggered by code changes.
Execute tests across multiple versions of programming languages, dependencies, and operating systems simultaneously.
11. Bamboo
Bamboo is a continuous integration and delivery server developed by Atlassian, designed to automate the build, test, and release process for software development projects.
Key Features of Bamboo:
Native integration with other Atlassian products like Jira, Bitbucket, and Confluence for end-to-end visibility and traceability.
It define build configurations and workflows using Bamboo’s intuitive interface or YAML configuration files.
Execute automated tests as part of the build process to ensure code quality and reliability.
12. Prometheus
Prometheus is an open-source DevOps automation tool for monitoring and alerting toolkit designed for reliability and scalability.
Key Features of Prometheus:
It stores time series data, making it easy to query and analyze metrics over time.
It allow for flexible querying and aggregation of metrics based on various dimensions.
PromQL enables users to perform complex queries and calculations on collected data.
13. Grafana
Grafana is an open-source analytics and visualization DevOps automation tool that allows users to query, visualize, and alert on metrics and logs from various data sources.
Key Features of Grafana:
It connects to a wide range of data sources, including databases, time series databases like Prometheus, and logging systems like Elasticsearch.
It create custom dashboards with interactive charts, graphs, and tables to visualize metrics and logs.
It uses variables and query expressions to create dynamic and reusable dashboards.
14. Splunk
Splunk is a powerful DevOps automation tool for searching, analyzing, and visualizing machine-generated data in real-time.
Key Features of Splunk:
Ingest and index data from a wide range of sources, including logs, metrics, events, and more.
It performs ad-hoc searches and complex analysis on large volumes of data using Splunk’s search processing language (SPL).
It creates custom dashboards and visualizations to monitor and analyze data trends, patterns, and anomalies.
15. Sensu
The Sensu is one of the open-source software and infrastructure monitoring tools. Sensu monitors servers, health of the application and services of application. Sensu is written in Ruby, and uses Redis to store data.
Key Features of Sensu:
It can manage to monitor using the web UI.
It is flexible to expand.
It provides swift implementation.
Sensu has built-in de-duplication which easily eliminates alert fatigue.
Conclusion
In all of the above DevOps automation tools choosing the best for you might be difficult. Because of the absence of robotization and normalization, hand-off learning onboarding and adaptation may be held to unreasonably high standards.
Sometimes, businesses within a similar company spend their time and money covering and comparing equipment, extravagantly wasting their time and money. Due to device variants’ age security issues grow uncontrolled, and combinations become dependent on old code, as engineers become tired from the same cycle of the job of building and integrating toolchains.
To achieve the goals of DevOps, it is required to automate everything. These tools not only help you in doing so but also remove manual errors as well as individual dependencies and allow the quality and speed of the product. These DevOps automation tools help you in scaling your business.